Working with depth layers
Different species often occupy different depth layers. Such layers may be defined by salinity or temperature, or simply by
ambient light or the availability of food. In order to study these species, the EK80 supports a Layer function. By means of this function, you can create your own depth layers in the water column to improve the dynamic data
required for analysis.
Description
Layers are used to calculate various values from the echo data collected within a specific depth range in the water column.
By default, a background layer collects all the data from the range chosen on the Main menu. Unless you specify your own layer(s), all data presented by the various information panes are calculated from this
background layer. However, with a large range selected - as in the background layer - the data will not be very accurate.
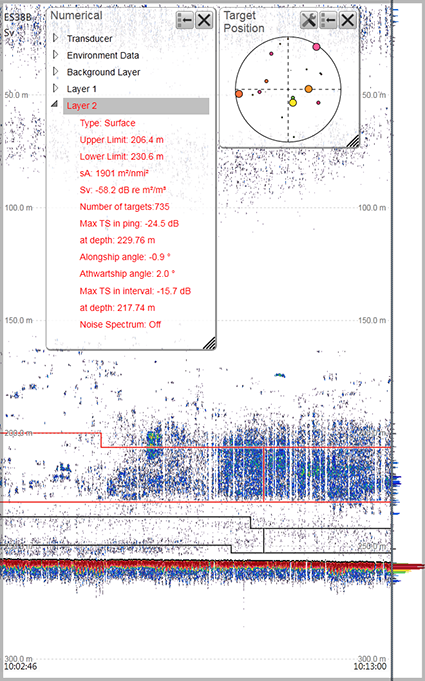
Once you create your own layer, all calculated values from this layer are displayed in the Numerical information pane. When the layer is selected ("activated") in the Numerical information pane (layer data shown with red text) or in the echogram, all data shown by the relevant information panes are
calculated from the echo data within the selected layer.
Note
The layers are a key function of the EK80. During normal operation, make sure that you are aware of the layer(s) that you have established, and that the requested
layer is activated to feed information to the information panes.
You can create as many depth layers as you want on the EK80. By default, any layer you create will be applied to all echogram views simultaneously. The layers may overlap if necessary, and you can control how much they overlap each other.
When you are working with layers, the following functionality is available.
| • | To create a new layer, use the New Layer dialog box. The New Layer dialog box is located on the Active menu. |
| • | In the echogram, you can click between the layer lines in the echogram view to select ("activate") it. The active layer is shown with red border lines. Note
The information shown in your information panes only reflect the echo data from the currently "active" layer.
If you wish your information panes to show data from the entire water column, you must either click "outside" the layer(s)
in your echogram to deselect all of them. This will "activate" the default background layer. Another option is to simply delete
all the layers.
|
| • | Once a depth layer has been made you can change its properties using the Layer Properties dialog box. If you only wish to change the range settings, you can also click and drag the line(s) in the echogram view. The lines in the echogram will reflect the changes you make, but these will disappear to the left after some time. Observe that vertical lines are drawn in the echogram to identify the start of each calculation interval. The Layer Properties dialog box is located on the Active menu. |
| • | A single layer can be deleted if you do not need it any longer. To delete a layer, select it in the echogram or in the Numerical information field (layer data shown with red text), and then click Delete Layer. The Delete Layer function is located on the Active menu. |
| • | When you record raw data, the layers you have defined are not included. This means that you can also use the layer functionality during replay. |
| • | Each of the depth layers can be used to measure the background (ambient) noise in the water column. |
| • | The Numerical information pane is the best tool for controlling your depth layers. All layers are listed, even those that may be located outside your current echogram presentation. The different layers can easily be activated by clicking the list of numerical data. |