ADCP information pane
The ADCP (acoustic Doppler current profiler) information pane displays the velocities of the water currents in the horizontal and
vertical directions. Horizontal water velocities are shown in a 360-degrees presentation resembling a compass rose.
Prerequisites
This information pane is available only when ADCP functionality is activated.
How to open
Select the ADCP Views button on the top bar to open the ADCP information pane.

To close the information pane, select it one more time on the top bar. You can also select Close in the top right corner of the pane.
Description
The ADCP (acoustic Doppler current profiler) information pane displays the velocities of the water currents in the horizontal and
vertical directions. The horizontal velocity is shown on the left side of the information pane. The vertical velocity is shown on the right side of the information pane. The numerical values are shown at the bottom of the information pane.
The vertical velocity presentation is optional. The presentation can be enabled or disabled on the ADCP page. The ADCP page is located in the Information Pane Options dialog box.
Each measurement of the water current velocity is presented as a vector drawn as an arrow. The length of the arrow indicates the velocity of the water. The tip of the arrow indicates the direction.
Tip
Use the ADCP page to control the basic properties of the ADCP information pane. To open the Information Pane Options dialog box, select the button on the Active menu. You can also select the Setup button in the information pane.
Velocity can be measured in different units. Choose the unit of measurement on the Units page. The Units page is located in the Installation dialog box.
Depth layers
Layers are used to calculate various values from the echo data collected within a specific depth range in the water column.
By default, a background layer collects all the data from the range chosen on the Main menu. Unless you specify your own layer(s), all data presented by the various information panes are calculated from this
background layer. However, with a large range selected - as in the background layer - the data will not be very accurate.
Create a new layer (or use an existing layer) if you wish to display the water velocity in a specific depth range in the water
column To create a new layer, use the New Layer dialog box. Click between the two layer indicator lines in the view to activate a layer.
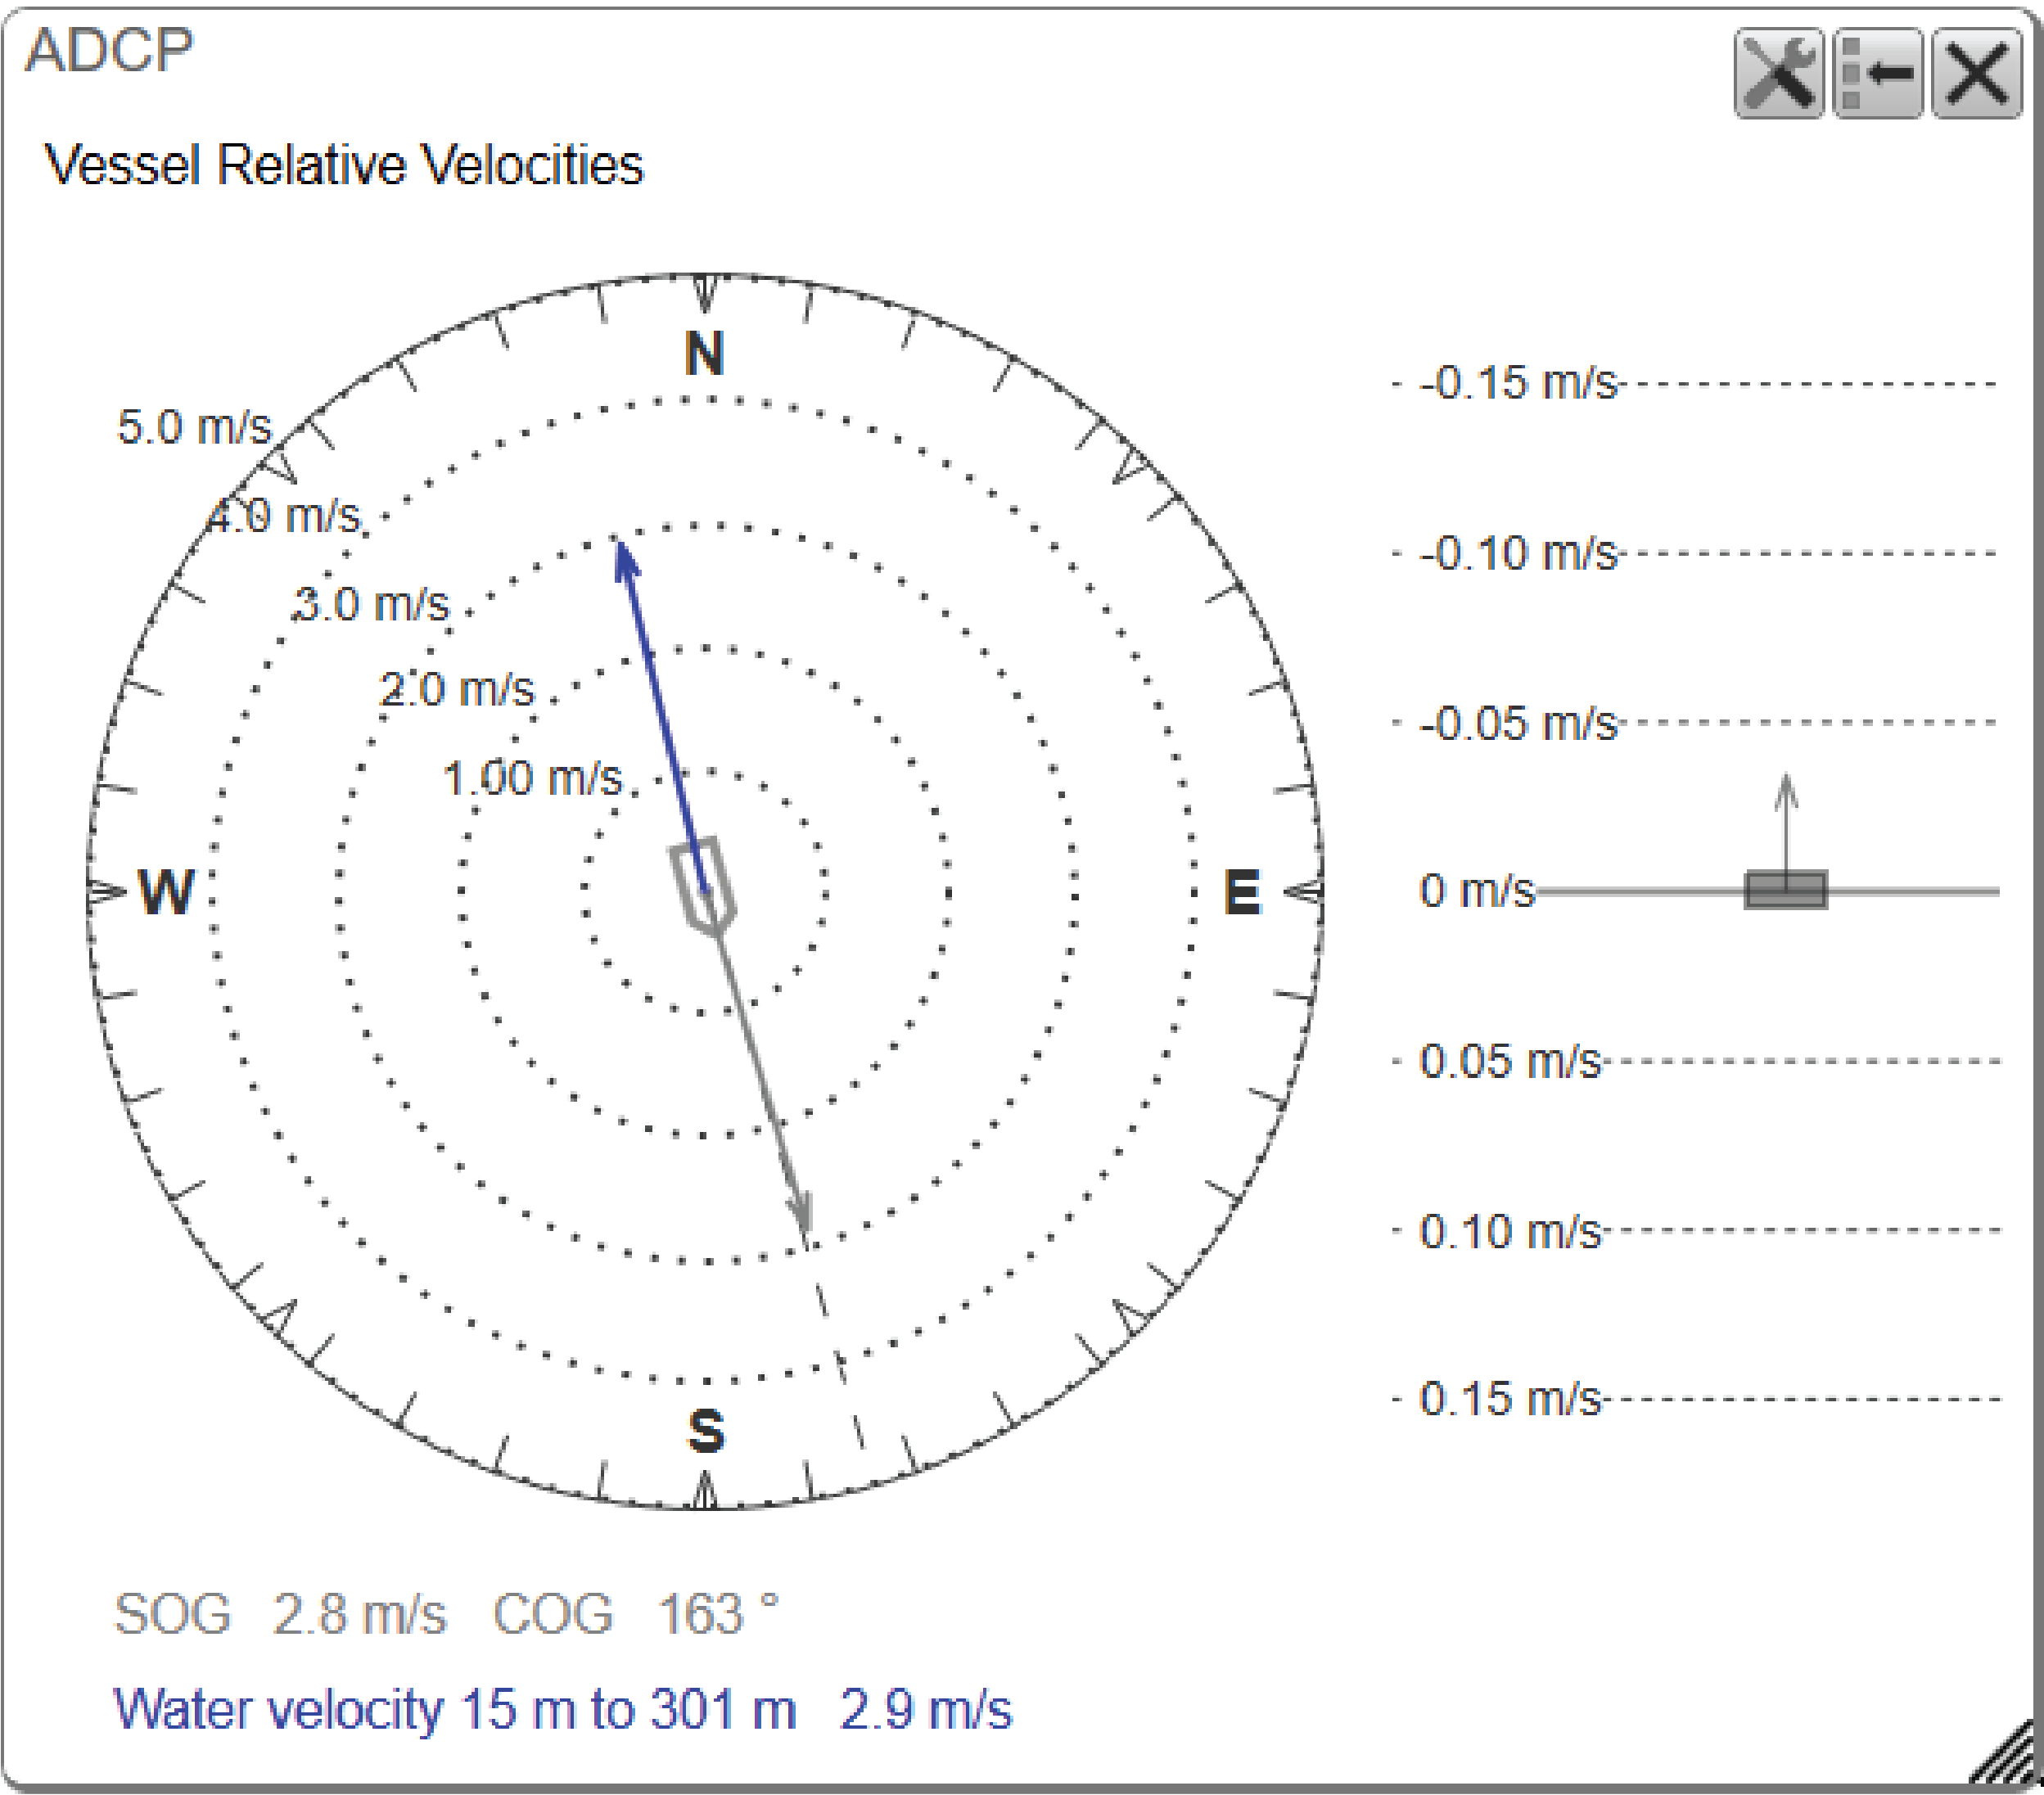
Horizontal velocity
Horizontal water velocities are shown in a 360-degrees presentation resembling a compass rose. Your vessel is located in the centre of the presentation. Speed ranges are shown with dotted circles. Two different velocities are presented.
Water velocity
The measurement presents the estimated velocity of the water current within the active layer. The measurement is shown as a coloured arrow. The length of the arrow indicates the velocity of the water. The tip of the arrow indicates the direction.
If you have not selected a layer, the measurement is based on the entire depth of the water column.
The numerical values are shown at the bottom of the information pane.
Speed over ground/Course over ground
The ADCP information pane also presents the vessel's speed and course relative to the ground. The measurement is shown as a grey arrow. The length of the arrow indicates the speed. The tip of the arrow indicates the course.
The numerical values are shown at the bottom of the information pane.
The properties of the arrows are defined on the ADCP page in the Information Pane Options dialog box.
Vertical velocity
The vertical velocity is presented with a bar graph. The upwards or downwards direction of the water current is shown. The length of the arrow indicates the velocity of the water. The properties of the arrow is defined on the ADCP page in the Information Pane Options dialog box.
Properties defined on the ADCP page
Orientation
The Orientation choices specifies the physical direction of the 360-degrees presentation as related to your vessel. This setting will affect the direction of the velocity arrows.
| • | Select Bow Up to place the vessel with its bow up at all times. The presentation of the velocities, regardless of any relativity, will adapt to this setting. |
| • | Select North Up to place "North" at the top of the 360-degrees presentation at all times. The presentation of the velocities, regardless of any relativity, will adapt to this setting. |
Compass
The "compass rose" presentation will be applied with either cardinal or vessel relative directions.
| • | Select Geographical to set up the presentation relative to the cardinal directions (north. south, east and west). |
| • | Select Vessel Relative to set up the presentation relative to the vessel directions (fore, aft, port and starboard). |
Bow Marker
You can add a bow marker to easier identify your current heading. The bow marker shows you the vessel heading related to the direction of the horizontal current.
This is an "on/off" switch. Select the box to enable the function. The bow marker is shown as a dotted line drawn from the bow of the vessel symbol. The line reflects your vessel’s current heading.
Velocity Vector
Each measurement of the water current velocity is presented as a vector drawn as an arrow. The length of the arrow indicates the velocity of the water. The tip of the arrow indicates the direction. The horizontal velocity vectors can be presented using relative or true bearings.
| • | Select Geographical to present the vector relative to the cardinal directions (north. south, east and west). |
| • | Select Vessel Relative to present the vector relative to the vessel directions (fore, aft, port and starboard). |
If you choose to present the vectors relative to the vessel, the speed of the vessel is superimposed to the velocity of the
water current.
Maximum Speed
This is the maximum speed setting for the velocities presented in the ADCP information pane. It thus controls the scale in the "compass rose" presentation. Adapting the maximum speed range to the maximum velocity value provides a better visualisation of the velocity and the changes
in the velocity.
Select Auto if you want the EK80 system to provide automatic scaling.
Velocity can be measured in different units. Choose the unit of measurement on the Units page.
Use Large Captions
This is an "on/off" switch. Select Use Large Captions to increae the size of the captions in the bottom of the information pane.
Reset size
You can easily change the physical size and shape of each information pane. Click in its lower right corner, and drag to a new size. To reset the information pane to its default size, select the Reset size button in its top right corner.
Transparency
The Transparency function allows you to adjust how much you are able to see "through" the information panes you have opened. You can adjust the setting from 0% (no transparency) to 90% (almost full transparency) in steps of 10%.

Details
Close
Select this button to close the information pane. The pane closes immediately. If you wish to reopen it, simply click the button on the top bar one more time.
Reset Size
You may have manually changed the physical size of the information pane. To reset the information pane to its default size, select the Reset size button in its top right corner.
Setup
Select Setup to open the Information Pane Options dialog box. This dialog box allows you to change the presentation parameters related to the information pane.