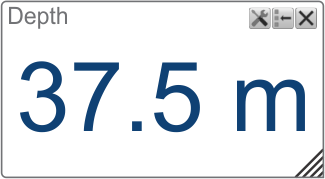
5 Opening the Depth information pane to read the current depth
You can easily read the current water depth in the Depth information pane.
Context

The Depth information pane provides the water depth in the current echogram view. If you have several echogram views open, you can place one pane in each view.
Procedure
| 1 | Click in the view you want to activate. The active view is identified with a thicker border. The information provided will only be valid for the selected view.
|
| 2 | On the top bar, select the appropriate information pane to open it. |
| 3 | Click the bottom right corner of the information pane, and drag to requested size. |
| 4 | Select a Transparency setting that fits your requirements. The chosen transparency percentage is used on all open information panes.
|
| 5 | Investigate the information provided by the information pane. The information pane shows the depth measured by the selected channel. In this context, the term channel is used as a common term to identify the combination of transceiver, transducer and operating frequency. By default, the depth is shown in metres. You can change the unit of measurement on the Units page. The Units page is located in the Installation dialog box.
Tip
If you have problems with bottom detection, you may consider disabling it. This can be useful if you only wish to study targets in the water column. Use the dedicated Bottom Detection function.
|
| 6 | Select Setup in the top right corner of the information pane to change the pane parameters. Selecting Setup in the Depth information pane opens the Bottom Detection page in the Information Pane Options dialog box. The purpose of the Bottom Detection settings is to define the upper and lower depth limits most likely to be used during normal operation.
|
| 7 | Select Close in the top right corner to close the information pane. |